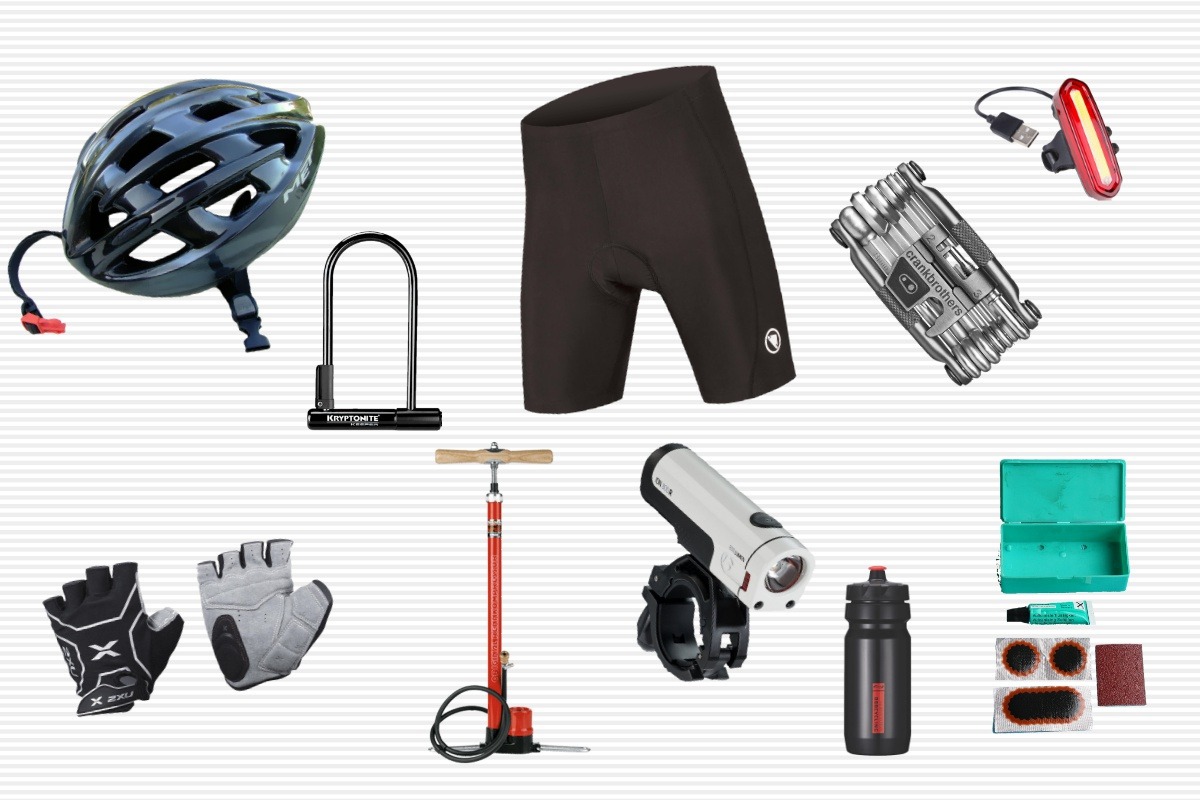
Bought a new cycle and wondering what are the accessories you need? Here are 10 cycle accessories for new cyclists to get you going!
10 Cycle Accessories for New Cyclists
You buy a new cycle to start off your cycling journey and like any normal person look to accessorise. That is the moment when you are hit with a slew of options, things you need to buy, want to buy and some absolutely superfluous additions. The problem is you are unable to tell the difference between the three categories.
This article lists out the 10 essentials to complement your journey into the world of cycling in India:
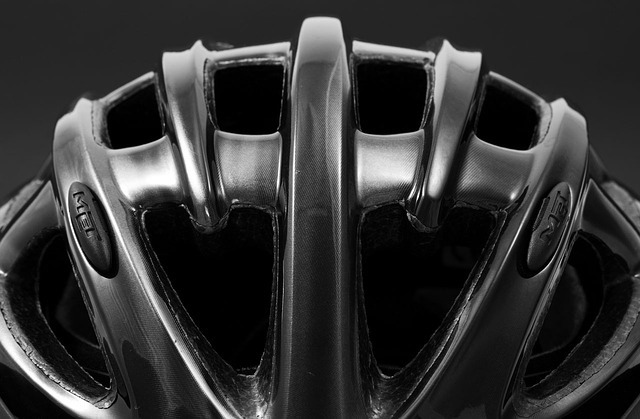
1. Helmet
This should be your first purchase along with your cycle. The importance of a helmet cannot be stressed enough. According to an Australian study, helmets reduce the risk of serious head injury by 70% and the US based Snell Memorial Foundation estimates that 95% of cyclists killed were not wearing a helmet. These are serious figures.
Whether you are on the road or riding trails, a helmet can save your life.
Things to remember when buying a new cycling helmet:
- Size: Ensure you choose the correct sized helmet which fits snugly on your head.
- Type: The type of helmet you need for your riding style, road, aero road, MTB, leisure/ commuting, full face, BMX etc.
- Features: What does the helmet offer in terms of weight, ventilation, safety standards, retention system and padding.
- Shape: Different brands have different shapes of helmets. So a helmet which might be the correct size might not fit perfectly. Try on a helmet to see which works best for your head shape.
READ: Things to Consider When Buying A Cycling Helmet
2. Puncture Repair Kit
With a helmet you have secured yourself from a puncture of your skull. But your tyres and tubes will regularly puncture. For that you need to always carry a puncture repair kit.
Most stores will have a kit with everything neatly placed in a small box. If you would like to make your own, then…

This is what your kit should have:
- Patches: The patches of rubber which actually cover the punctured area in the tube. Keeping around 6 patches is good, not that you will need so many, it is in case you forget to refill before your next ride. You can get yourself glueless patches, they make for easier usage.
- Tyre Levers: To get the tyre of the rim and access the tube, for removal or repair. In a crunch, you can get the tyres off by hand, but it is always nicer to have a pair of levers.
- Glue: To help you fix the patches to the tube.
- Sandpaper: Fine emery paper or some form of scrubber to smooth out the rubber before applying the glue.
- Spare Tube: Because it is much more convenient to repair the puncture from the comfort of your home and just replace the tube on the road.
- Mini pump: A small pump which fits in your jersey pocket or can be fixed onto the frame of your bike.
- Tyre Plugs: If you have a tubeless setup on your bike, then you will need these plugs for repairing punctures which don’t automatically seal with the sealant.
3. Pump
The only thing you regularly need to do is pump up your tyres to recommended pressures. This not only helps with better grip, control and stability, but also reduces the probability of punctures.
In an ideal world you would have two pumps, a track pump to be kept at home for topping up your tyres. And a mini pump to carry along on a ride. If you want to spend on only one initially, which should you go for?
There is no clear answer. For a mountain bike, a mini pump will suffice, since you don’t need to pump up to very high pressures. Schrader valves can be topped up with pumps used for automobiles. Road bikes run high tyre pressures, which is difficult to get with a mini-pump. If you ride in a group, then you can hope someone else is carrying a pump! It depends on the type of bike and circumstances you find yourself in.
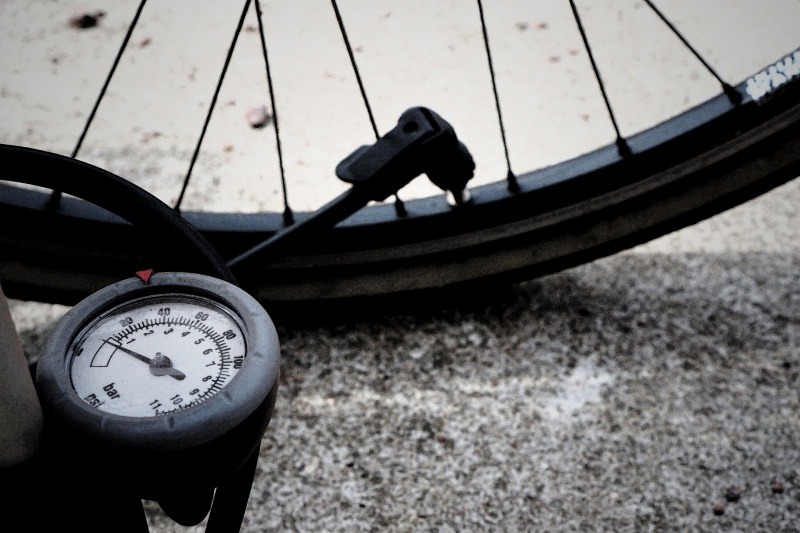
How to choose a cycle pump:
- Volume and Pressure: For mountain bikes you will need higher volume and for road bikes higher pressure. In general, a thicker trunk will have more volume and vice versa.
- Gauge: Some pumps come with an inbuilt gauge, useful to know the pressure you have pumped up to. Pumps without a gauge will be cheaper, but you will need to ‘guess’ the pressure in your tyres!
- Hose: The length of the hose on the pump. Mini-pumps do not have a hose, which can damage the valve while filling air. Track pumps have a reasonably long hose to make it much more convenient to fill air.
- Valve Type: Nowadays, most pumps being sold are compatible with both Presta and Schrader valves. If not, check which type is fitted on your tubes.
- Size and Weight: Not something to worry about in a track pump, but for a mini-pump it is an essential feature which helps people decide. The lighter and smaller, the easier it will be to carry on every ride.
- Construction Material: Pumps made of plastic will not last as long as pumps made from metal. Of course there will be a difference in price as well.
4. Headlight/ Tail light
If you plan to commute or ride a lot in the dark, then getting yourself a set of lights is important. A study in Denmark suggested that using lights during the day can also help reduce accidents by 19%.
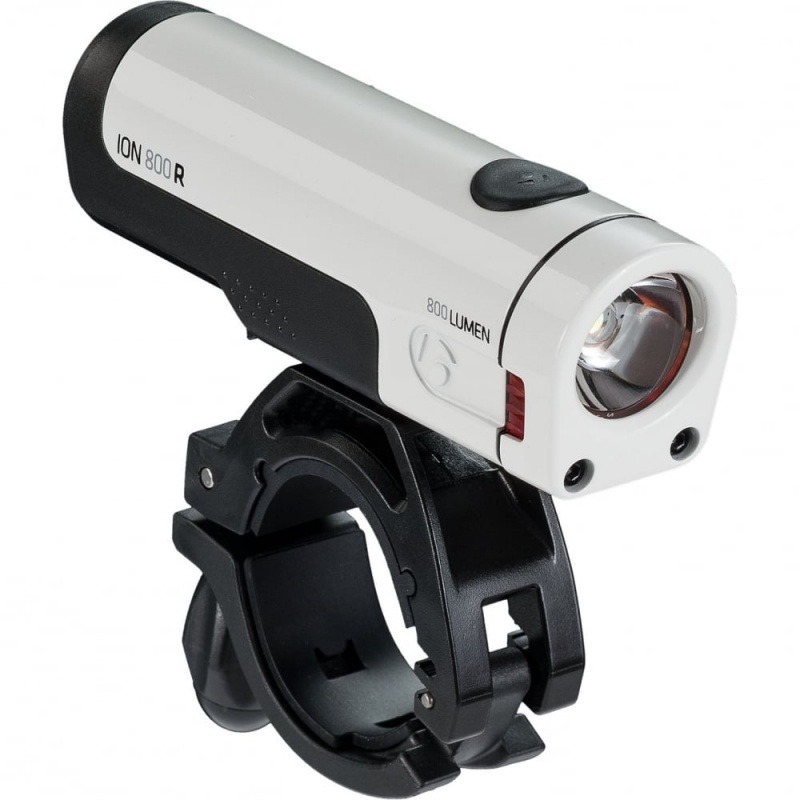
Tips to choosing bicycle lights:
- Lumens: This is the measurement of the amount of light that is produced. The higher the number, the more the light. Typically front lights will produce anywhere between 100-600 lumens. Tail lights will produce 5-100 lumens.
- Battery Backup: Ideally, your lights should last the average duration of your ride and still have some 20% in reserve for a bad day!
- Modes: For front lights, very bright lights have multiple modes for conserving the battery and increasing its usage. Rear lights usually have an array of blinking options.
- Beam Spread: The headlight should be focused on the road ahead. It should not scatter to the point where it blinds oncoming traffic.
- Batteries: Older models of lights used replaceable batteries, most lights now are rechargeable, either through USB or wall sockets.
- Mounting: A stretchable band is sufficient for rear lights, but headlights need a more secure mounting system, since they tend to be heavier.
5. Lock
An essential component of cycle accessories for new cyclists who are planning commute with their bike. Most people will not let their bike be out of sight for even a teenie weenie second. If you aren’t one of them and expect your bike to be parked away, then you need to secure it properly with a cycle lock.
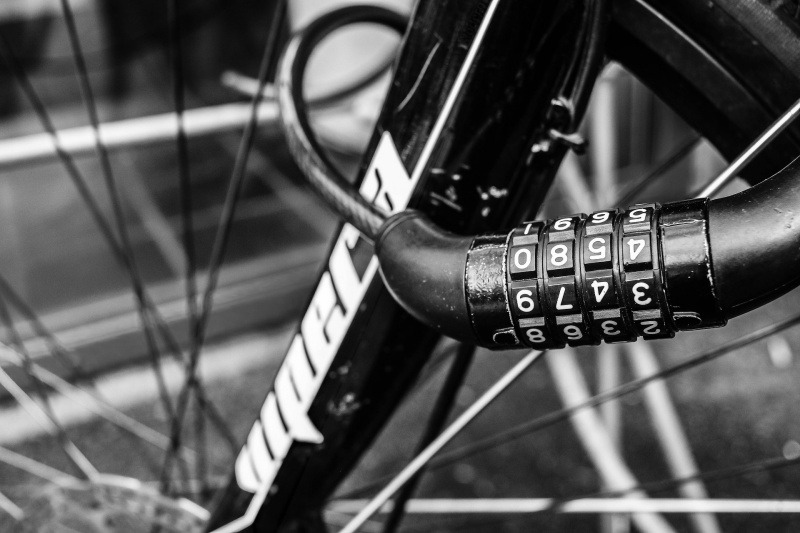
Things to keep in mind when buying a cycle lock:
- Key vs Combination: Combination locks are more convenient to use, since you don’t have to worry about carrying the key. But these locks are easier to pick.
- Carrying Ease: How big or bulky is the lock to carry. The more bulky it is, the less likely you are to lug it around.
- Don’t go Cheap: It is tempting to buy a cheap lock. Don’t forget the value of your bike when buying the lock!
- Weight: A lock which is too heavy to carry will go unused. Yet stronger locks, will generally be heavier.
6. Gloves
Once you have got the bare bone essentials to get out cycling safely. Then it is a good idea to invest a bit on making yourself more comfortable on the bike. Once you have fitted out your bike properly for yourself, you will find that a lot of your body weight is on your hands.
Till you get habituated to cycling regularly, it is a good idea to buy a pair of padded gloves. These dampen some of the shock emanating from the road, as well as provide support to the palms, avoiding numbness in the hands.

Few considerations when buying a new pair of gloves:
- Breathable: The glove material should be breathable so as to not trap the sweat and make your palms all cold and clammy. Ideally the top half of the glove should be made from a moisture wicking material.
- Protection: Gloves offer protection in case of a fall. For riding on the road you require less protection as compared to riding trails.
- Grip: The inner portion of the glove should be made of a material which provides adequate grip for you to safely hold the handlebars.
- Weather Rating: Are the gloves designed for summer or winter? In most parts of India, you can get away with buying only a pair of summer gloves.
- Fit: It doesn’t matter how good the glove is, if it doesn’t fit you properly. The size should be perfect and it should fit snugly without being too tight as to restrict the flow of blood.
7. Padded Shorts and Jersey
Two articles of clothing which make your cycling life a pleasure. Padded shorts to ensure you remain a happy bum and not a sore arse! And once you have experienced the convenience of jersey pockets, you will want to wear them everywhere.
As you start increasing the number of hours in the saddle, you will want to improve the quality of shorts and jersey you wear. But for starters, basic stuff will do just fine. Remember, cycling shorts are designed to be worn WITHOUT underwear!
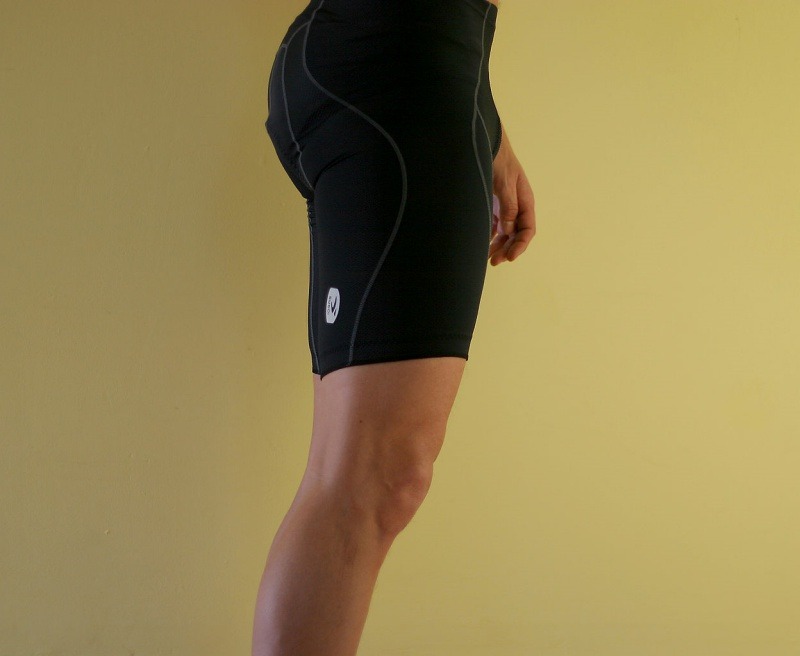
Things to note when buying cycling shorts:
- Padding Material: The most important part of the shorts, these can be thick or thin, dense or otherwise. It is a good idea to see the manufacturer’s rating for the number of hours it can be used comfortably. The longer the hours, the higher will be the price.
- Road or Baggy: Baggy shorts are generally good for commuting and mountain biking, these have pockets making them very convenient and generally come with a padded liner. Road shorts do not have pockets, but stick to the skin and reduce the chance of chafing as well as being more aerodynamic.
- Waistband or Bibs: The preferred shorts for serious cyclists are bibs, where two straps go over your shoulders and hold the shorts in place without the pressure of a tight elastic on your abdomen. But these are a tad bit inconvenient for casual cyclists as going to the loo can be a pain in the posterior!
- Colour: White will be see through if it rains and remember you aren’t wearing underwear. Black is best as it matches up with any colour jersey you have.
- Size: Different brands have different sizing, so you might fit an M in one brand and an XL in another. Check their chart!
8. Saddlebag
Once you have bought a puncture repair kit, tube, pump and multi-tool, you might wonder where to keep it all. Initially a lot of cyclists carry a small backpack with their gear in it, but this can be quite inconvenient. Sweaty backs and all for just a handful of tiny stuff.
A saddlebag which is fixed under the saddle and on the seatpost will fit in all your cycling essentials. You can fix it on and leave it there till the day you actually have a breakdown. It is easy to fix and remove so that isn’t too much of a problem either.
What to look for when buying a Saddlebag:
- Size: For your cycling essentials, the smallest size will do. If you plan to carry anything more, then you will need to go up sizes, till you find what suits your need best.
- Material: Cheaper bags will not use waterproof material and zippers. This can cause the tools inside to rust, tubes to spoil, emergency money to be unusable etc. If a waterproof bag is out of your budget, store everything in a plastic bag before placing in the saddlebag.
- Locking Mechanism: Zips, clasps or rolls. Zips are the preferred choice and work well in practice, even though in theory zippers can fail at any point of time.
- Installation Mechanism: Thin Velcro straps or quick release docks. The docks are more expensive and keep the bag a bit further away from the saddle, thus avoiding rubbing. But it works best if you only have one bag for each cycle. Velcro straps which loop around the saddle rails have been tried and tested and work perfectly.
9. Bottles
While it is okay to use soft drink bottles or mineral water bottles in the beginning. You really want to get dedicated cycling bottles for regular rides. These are easier to clean, drink from while on the move and fit more snugly in the bottle cages on your bike.
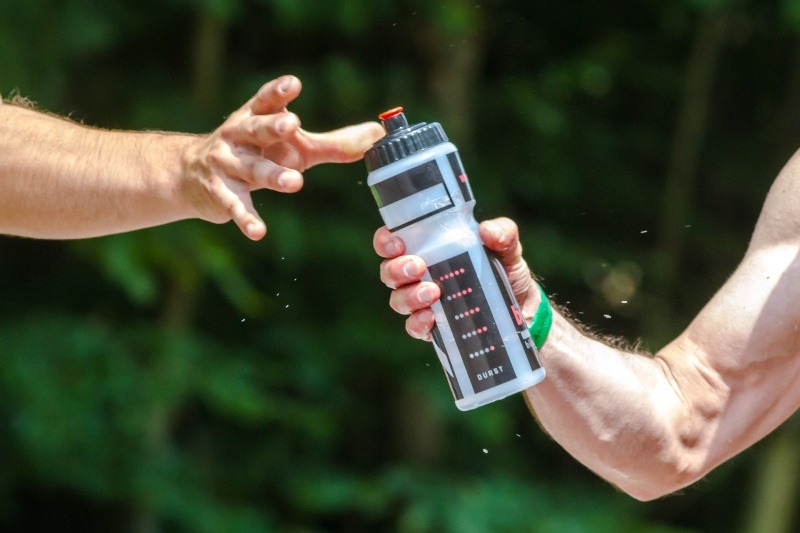
Things to remember when buying cycling bottles:
- Material: Almost all cycling bottles will be made up of some sort of plastic or the other. When the bottles heat up, while out riding in the sun, the water tastes ‘plasticy’. Some of the expensive bottles claim to use materials which prevents this.
- Capacity: Depending on the duration of your ride and the number of bottle holders, you would want to choose a bottle. This can be anywhere between 0.5 to 1 litre. Smaller bottles are easier to drink from while riding, while larger bottles are heavier and a bit more tedious to remove and put back.
- Insulation: In a hot country like India, you want a bottle with insulation, so that you can have cool water even an hour after being on the road. These of course are more expensive than non-insulated bottles.
- Shape: The bottle should be shaped such that it fits in the bottle cage without falling out and it is easy to hold and drink with one hand while pedalling.
10. Multi-tool
The final item in your starter kit. Why is it at the bottom of this list? Because you need to learn how to use it as well! Else it is dead weight in your saddlebag. Read 10 On The Road Repairs That Every Cyclist Should Know. A multi-tool is as important for a cyclist as a Swiss Army Knife is for most guys, but unlike guys who only ever end up using the bottle opener on their knives, a cyclist will eventually use all the heads on their multi-tool!

What should you look for when buying a cycle multi-tool:
- Size and Weight: Bigger tools will give more leverage to loosen bolts. But it will be more difficult to fit into and carry in your saddlebag.
- Chain Breaker: The more expensive multi-tools will have a chain breaker in it. The cheaper ones don’t. This is an essential component of your emergency kit. You might want to buy a chain breaker tool separately, if your multi-tool doesn’t have it.
- Usable Tools: Check what size Allen bolts are used on your bike. Make sure your multi-tool has those sizes in it. Newer bikes have torque keys, star shaped heads, cheaper multi-tools do not have a tool to tighten it. The multi-tool should also have a flat-head and Philips screwdriver.
These 10 basic cycle accessories for new cyclists will help you get around on your bike safely and without problems. Once you have these items in your kitty, you can go splurge on the endless list that cycle accessory manufacturer’s offer! Or, you can just get on with riding your bike…

Read about preventing yourself from cycling injuries and commuting safely on your cycle in India. Here’s a list of Online Cycling Stores in India from where you can purchase all your accessories!
Really good gyan, should be helpful to neo-cyclists, especially the patch on the seat!!